
Add a clickable link to the tooltip
This article explains the steps for adding a clickable link to the tooltip. We will use a tilemap circle to demonstrate how to do this
1. Create a tilemap and enter the map editor
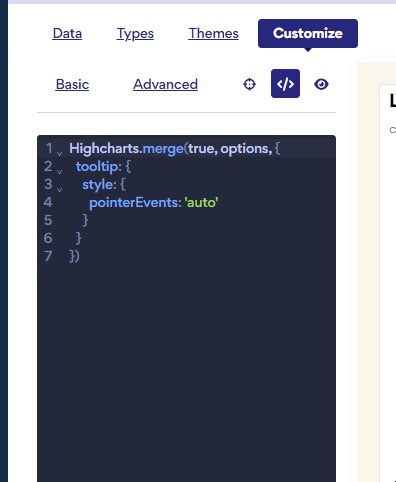
3. Paste the following code in the custom code panel:
Highcharts.merge(true, options, {
  tooltip: {
    style: {
      pointerEvents: 'auto'
    }
  }
})
In everviz, it should look like this:
4. Click the data tab
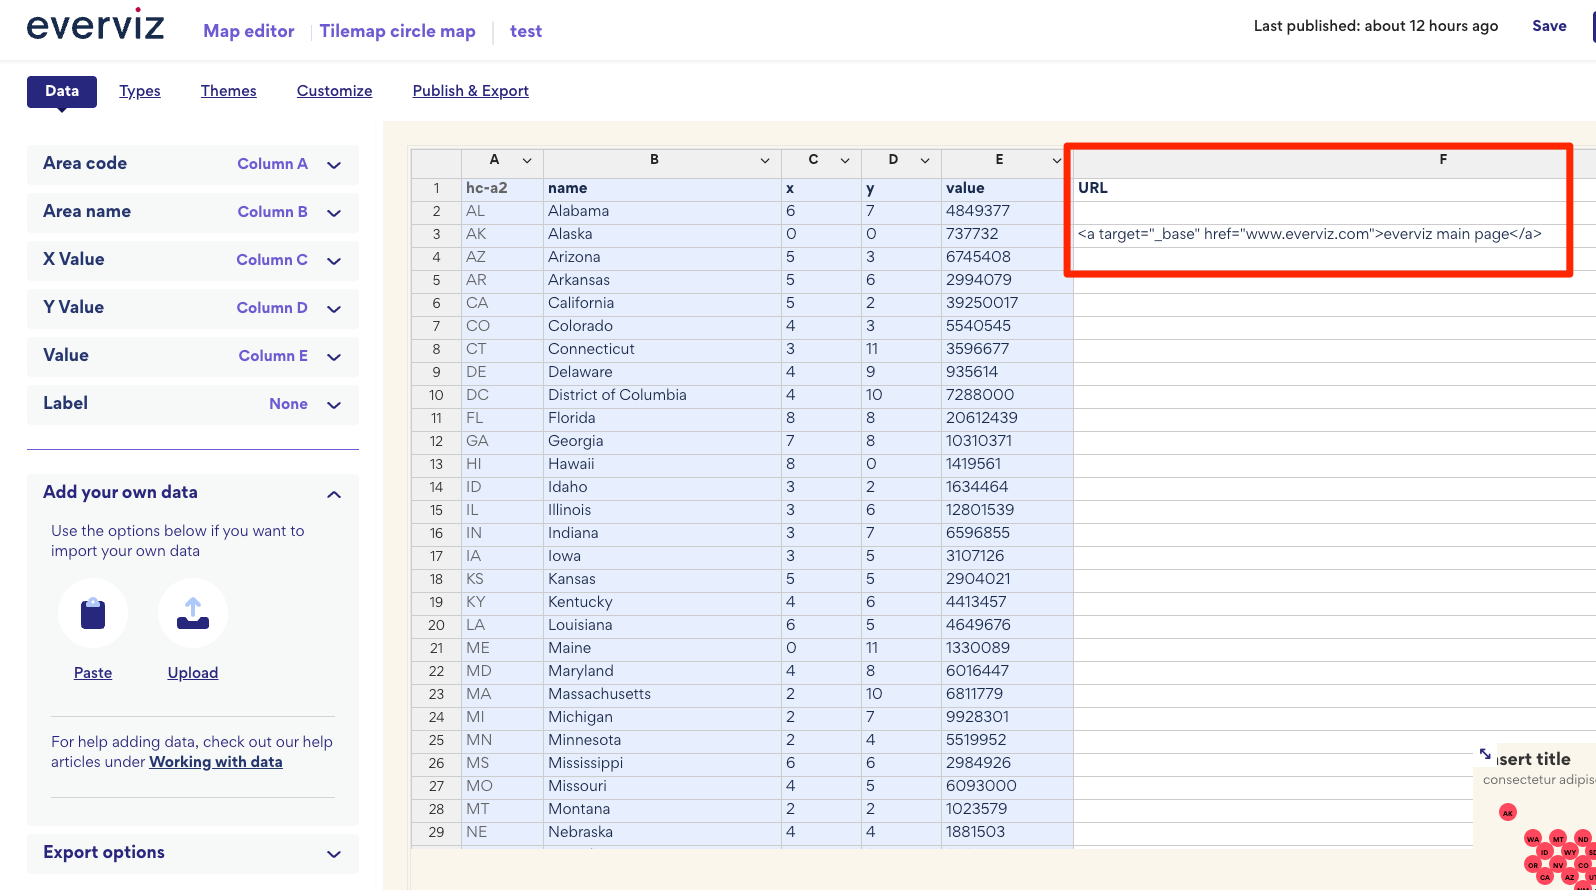
5. Add the URL into an empty column on the datagrid with this formatting:
<a target="_base" href="www.everviz.com">everviz main page</a>
To reference links in your dataset, you can add a dedicated URL column directly within the data grid.
- Insert the URLs: Input your link data into a new column. (Right click in the grid to add more columns)
- Label the Column: Add a clear, descriptive header to the top of the column so the data is easily identifiable.Example: Use "URL" as the header title.
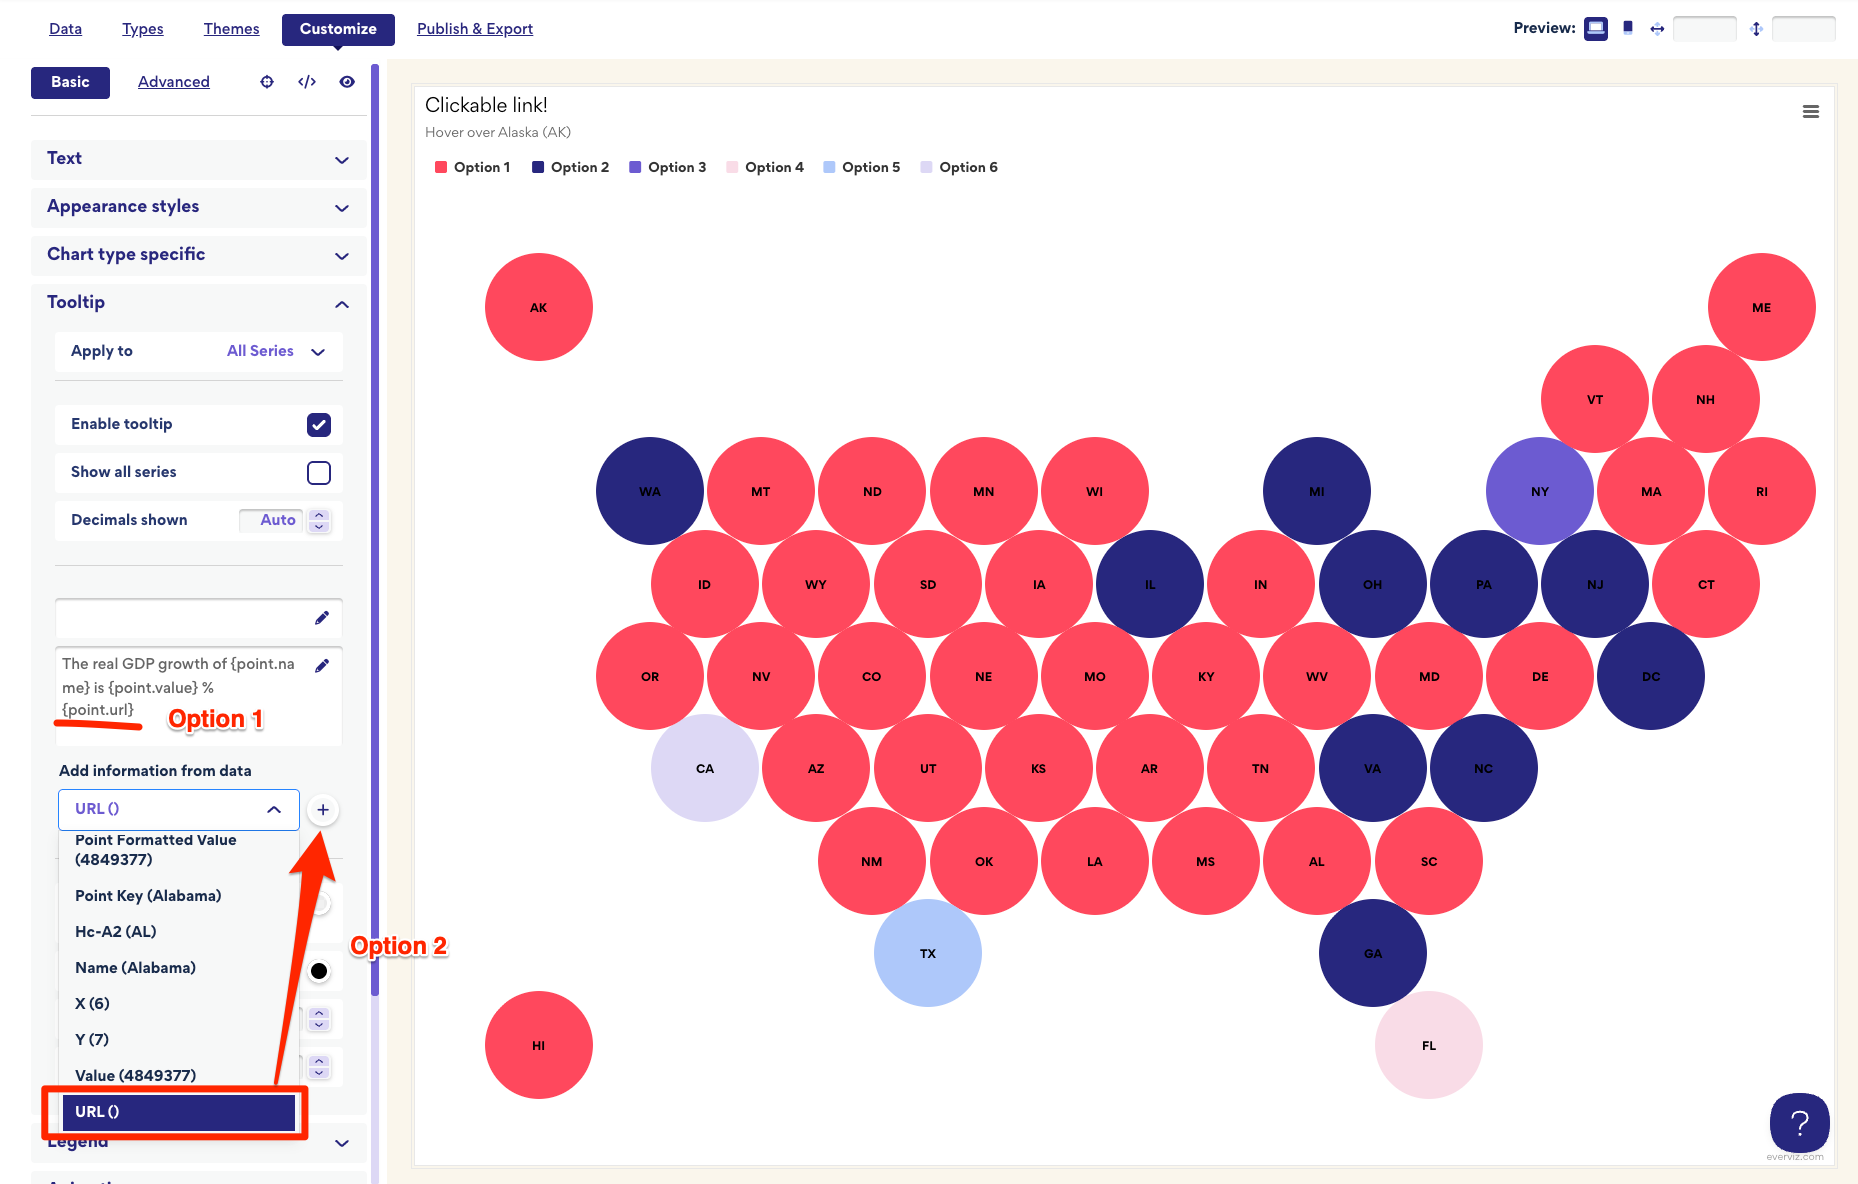
7. Go to Customize > Basic > Tooltip > Body
Once you have added the column to your data grid, you need to reference it so its values display in your chart or map tooltips.
Option 1: Manually Insert the Reference
Insert a reference to the newly created column directly in the data tab's text field.
- Syntax: Use the column header wrapped in curly braces.
- Example: {point.URL}
Option 2: Use the Dropdown Menu
If you prefer not to type the reference manually, you can insert it using the interface:
- Locate the dropdown menu below the tooltip text editor.
- Find your new column in the list.
- Click the + (plus) icon next to the column name to automatically insert its value into your tooltip body text.
8. The link in the tooltip is now clickable.
