Customize the editor
everviz is a powerful and flexible charting editor.
This page provides instructions for configuring your own everviz charting editor to display only the options you really need.
Control visibility of editor tabs
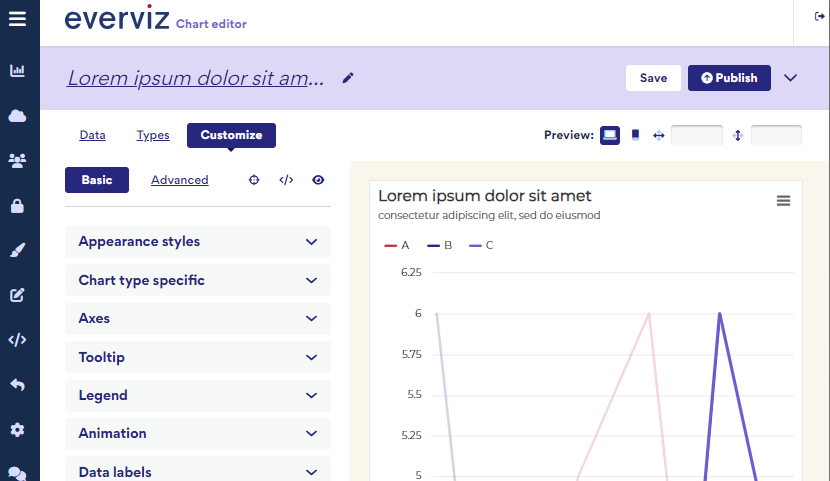
The everviz editor has rich customization options that are organized into different tabs, outlined in red here.

Note: Learn more about the editor here.
By default all tabs in the the everviz chart editor are enabled. Use the checkboxes in the enable tabs panel to control the visibility of the tabs in the editor.

Note: everviz has separate editors for each project type. Not all editors have the same tabs by default.
To enable and disable tabs:
- A checked box enables the tab in the editor, and an unchecked box removes the tab
Example
Here is a screenshot of the chart editor when all tabs (Data, Types etc.) are enabled (checked).

And here is the editor when the Themes tab is disabled.
The Themes tab has been removed by unchecking the checkbox next to Themes tab.

Upload custom fonts

Upload the organization's font into everviz to ensure charts stay on brand. Custom fonts can be applied to projects or themes right after uploading.
The edit and delete buttons enable updating new fonts and deleting fonts from the drop down, respectively.
To upload your organization's font(s):
- Click the + icon under Custom fonts
- Click Choose file, select your file and click Confirm
To apply a custom font to a chart or chart specific theme
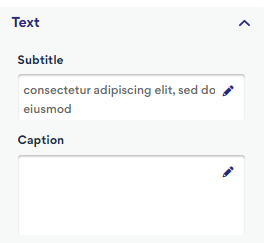
- Click the pencil icon in any text field in the editor

- Select a font in the inline editor in the chart preview window

To apply a custom font to a company theme
- See the global settings on the company themes edito
Extra info: Visit the themes section of the knowledge base for more information about fonts in everviz.
Logo
Upload your organization's logo.
Customize the editor
The everviz editors organize chart customization options into expandable panels. Most users will find the most useful customization options in the Basic Customize menu.
Here are the options in the basic customize menu, organized in an accordion menu. Clicking the chevron expands each option to reveal the customization possibilities for that category.
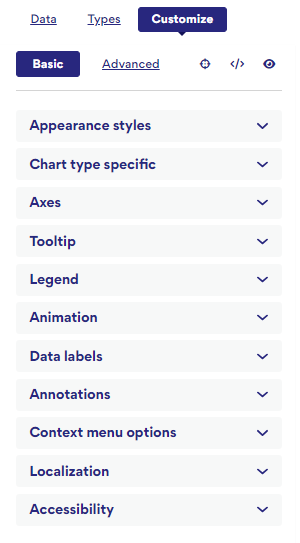
Each section in the basic customize menu has a corresponding section on the customize editor page.
To disable or enable an option:
All of the options in the basic customize menu are listed in the customize editor page.

- Options that are grey are enabled are visible in the app
- Options that are white are disabled are not visible in the app
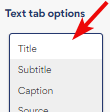
The first block called Text tab options controls the visibility of options in the Text tab in the Basic customize editor.
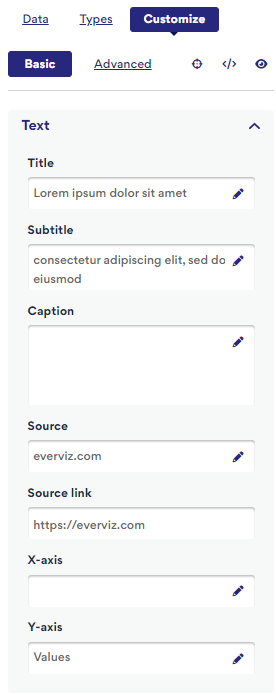 Clicking Title (turning it white and disabled) and clicking Save at the bottom of the page disables that field in the Editor, meaning the user will not be able to add a chart title.